Understanding Hexagons

I received an email from Linda M. about how to put together a Grandmother's Flower Garden. It was coincidentally the second time I got asked that question in the same week. I decided it was time to talk about my favorite pattern piece - the hexagon. Quilters, it would seem, don't understand them. So, first:
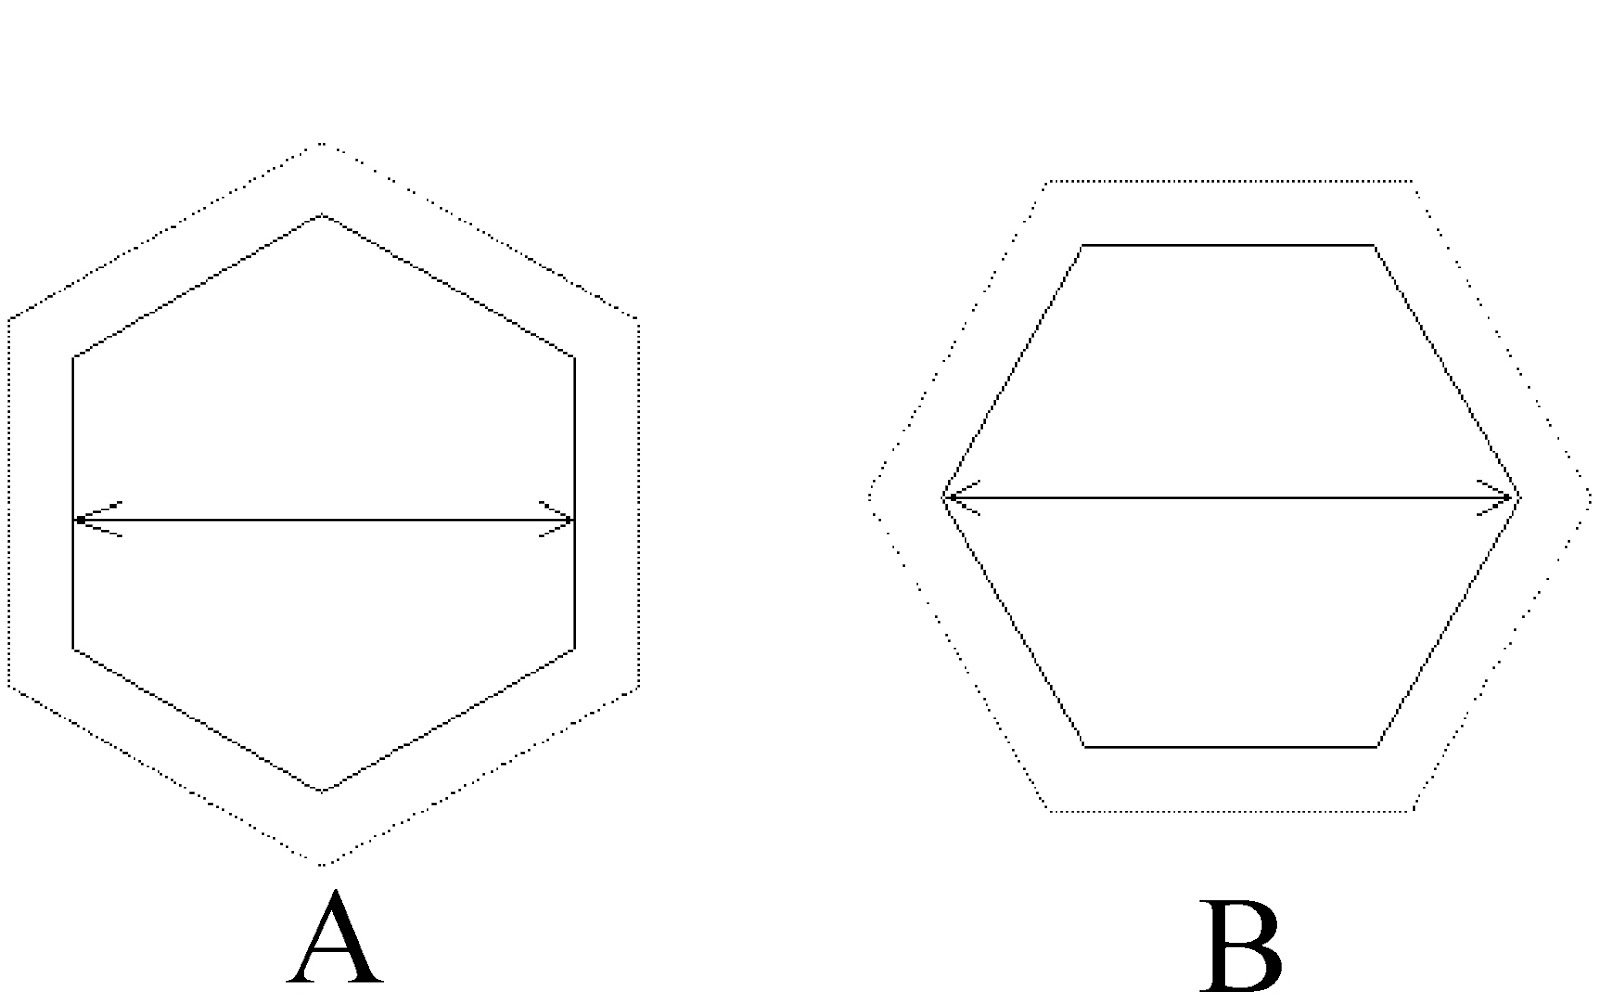
Above we have the same hexagon template shown in 2 positions. In A, the arrow is drawn across the flats and this denotes that the measurement of the hexagon would be "across the flats." On B, the arrow is drawn from point to point. If both hexagons were presented as 1" hexagons, they would in fact be different sizes if measured as shown. Also, when designing a quilt layout, you must decide if you want to design with the hex on point as in A or on the flat as shown in B. Keep in mind that you really need to keep track of the fabric grain in each piece. Your quilts will always look nicer if the grain of the individual pieces falls the way the piece is presented in the quilt. (This is true for any piece, not just hexagons, and is especially important in a miniature quilt. Grain is more obvious in tiny pieces.) Confused yet? Hope not.
Here is a typical 1930's style hexagon flower:

Now things start to get tricky. Because you have six sides and not four sides as you have with square blocks, the "putting together" of the flowers can be confusing. In the photo at the beginning, I have chosen a really difficult setting. It got so involved, I had to have my husband draw it in an engineering program and I really don't recommend it to anyone. There are easier ways to make a quilt top. Mine got involved because the green "path" between the flowers is diamonds and not hexagons. So, my design has the typical flower as shown above, surrounded by a round of off-white hexagons and then the path of green diamonds to hold it all together. I also wanted to finish my edge with a straight line to avoid having to bind all the angles that a flower would leave, so the edges are filled in with the appropriate piece - half a hexagon, etc.
I started to work on some layouts for you, but I googled "grandmother flower garden quilt layouts" and there is a wealth of info already out there, so there isn't much point in me repeating it. If you visit Paper Pieces, you can print out design sheets and color them in. I strongly recommend doing that so that you can see how the pieces all fit together. Paper Pieces is a company that makes paper pieces for English paper piecing. I have tried this method and it is very accurate. However, I prefer to just hand sew mine. To that end, you might want to visit Cindy Blackberg's website. She is now making a small hexagon stamp, as well as a larger one. You just use her stamp and stamp pad and this eliminates the need to mark your pieces.
That is about it for my intro to hexagons. I will just finish by saying if I could only have one quilt pattern piece, I would chose the hexagon. I could spend the rest of my life making nothing but hexagon quilts.
Hoping I didn't "hex" anyone...........
Sheila


Comments